Storms, Safety, and the Rocky Mountains: How My Tent Ridge Hike Reminded Me Why Being Prepared Matters
- Jul 11, 2025
- 6 min read
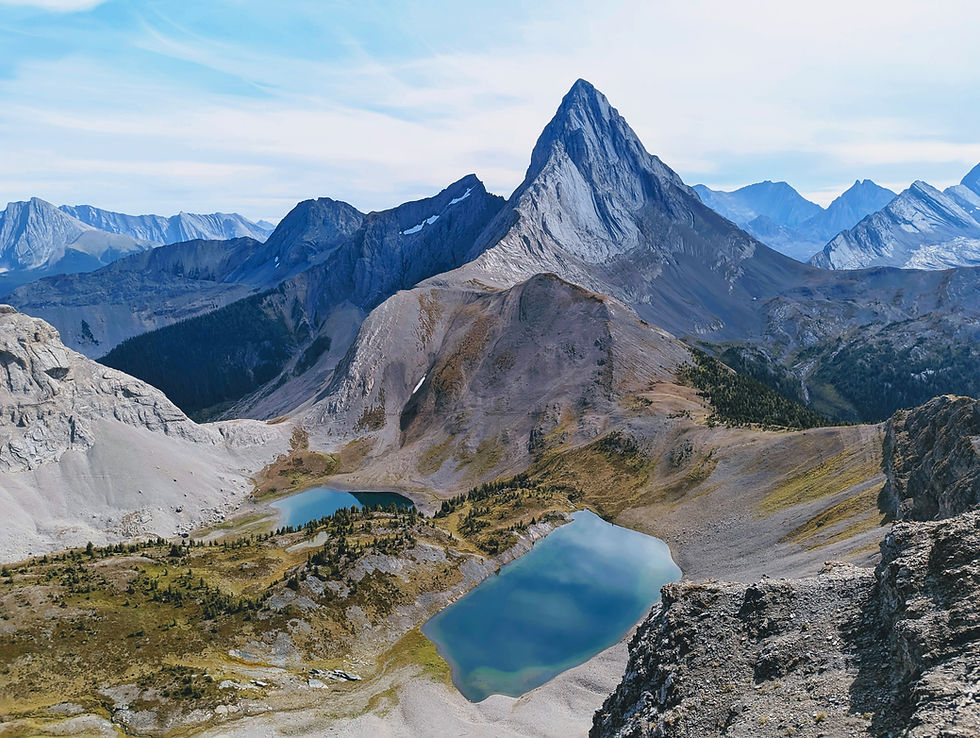
Last week, while standing on a ridgeline with all of Kananaskis spread out beneath me and nothing but sky for miles, a storm started brewing. Before I knew it, hail was coming in sideways and thunder was cracking ahead. As beautiful as the Canadian Rockies can be, they’re equally capable of turning dangerous fast if you’re not prepared.
It doesn’t take much—a shift in the wind, a cloud that builds quicker than you expect—to turn a perfect day into a scramble just to get down safe. That day on Tent Ridge hammered home something I’ll never stop preaching: be ready for the worst, even when everything looks perfect.
Here’s the gear, tools, and advice I rely on to keep a great day from turning into a disaster.

Preparation & Planning
Planning might not sound exciting, but it’s the difference between a cool story and a real rescue. Check the weather before you leave, but remember it can change in the Rockies in a heartbeat. A bluebird morning can flip to hail and lightning by lunch.
Check for trail closures on the Parks Canada website, as well as any Provincial Parks you’re travelling to. It’s always worth checking AllTrails for recent reports on bear sightings and conditions in advance.
One of the smartest things you can do is leave a trip plan with someone you trust. Don’t just say, “I’m going hiking.” Be specific:
The name of your trail or route and who you’re traveling with
What time you’re leaving and what time you plan to be back
Your car’s make, model, and license plate and where you’re parking
How to contact you and what they should do if you’re overdue—like calling Parks, RCMP, or Search and Rescue
There are lots of trip plan templates online that make this easy to fill out and share. It only takes a few minutes and could save hours—or your life—if something goes wrong.
Another solid trick is changing your voicemail before you head out. Leave details like your planned trail, route, group size, and when you’re supposed to be back. If your phone dies or you’re out of service, rescuers who try calling you will at least have some info to go on.
Know your limits and stick to your turnaround times. On Tent Ridge, we thought about heading back when the weather first started turning, but it looked like it might clear. We kept going. We regretted that decision the rest of the way when the storm rolled back in even worse. Trust your gut. When in doubt, turning around is rarely the wrong call.
Navigation Tools
My number one navigation tool will always be a paper map and compass. Batteries die, screens break, GPS signals vanish in canyons or dense forest. Maps don’t. And a compass doesn’t rely on satellites. Know how to use one before you actually need it—it’s a lifesaver if your electronics quit.
That said, I love digital maps. I personally use Gaia GPS for planning routes and tracking hikes. It’s reliable, accurate, and offers excellent topo maps.
Other solid apps include AllTrails and Wikiloc, both great for discovering new routes and reading recent trip reports from other hikers.
But here’s the key: always download your maps for offline use. Don’t assume you’ll have cell service. The Rockies are notorious for dead zones, especially in valleys and remote ridges.
Water & Filtration
Even if the rivers and streams look crystal clear, don’t trust untreated water in the Rockies. Wildlife, campers upstream, or simple runoff can all carry bacteria and parasites like Giardia. Drinking unfiltered water can leave you sick, dehydrated, and stranded far from help.
Always carry enough water for your hike and bring a way to purify more if you need it. I like lightweight filters like the Sawyer Squeeze or Katadyn. Purification tablets are another backup option and weigh basically nothing.
A handy trick: use your buff or multi-use piece of clothing as a pre-filter to strain out debris before using your main filter. It’ll keep your filter from clogging too quickly.
On some ridges and high routes, there’s no water at all. Know your map and plan accordingly.
Layering & Clothing
The weather in the Rockies doesn’t care about your plans. It can go from blazing sun to snow in an hour.
Start with good moisture-wicking base layers. Add an insulating layer for warmth, then a shell to block wind and rain.
A solid rain jacket is non-negotiable. This is one area where it’s worth spending more for quality. You want waterproof and breathable gear you can trust when the skies open up.
Other staples in my pack:
Buff or multi-use piece of clothing
Backup socks—nothing ruins a day like wet feet
Footwear with good grip for rocky, wet, or snowy terrain
A hat for sun or rain protection
Sunglasses, sunscreen, and lip balm with SPF—even in winter
Communication Tools
Cell service in the Rockies is a gamble. Sometimes you’ll have bars on a ridge; other times, you’ll have nothing for miles.
That’s why I carry a satellite messenger. Devices like the Garmin inReach or ZOLEO connect to satellites, letting you text family or friends or send an SOS to rescue services even with zero cell signal.
Be aware these devices often require a monthly subscription. Plans can range from affordable options for occasional use to pricier packages with unlimited texting and tracking.
Apple’s Emergency SOS via satellite on newer iPhones is a solid feature. It lets you send emergency texts when you’re off the grid, but it’s strictly for emergencies, not for casual chats. Plus, it needs a clear view of the sky to connect, and it’s not as robust for ongoing conversations as a dedicated satellite device.
Android makers are catching up. The Google Pixel 9 series now includes satellite-based emergency SOS too. It’s cool to see this tech expanding, but for now, dedicated satellite messengers remain the best bet for two-way communication in remote areas.
Knife & Multi-Tool
A knife or multi-tool doesn’t seem essential—until it is. Cutting rope, fixing gear, prepping food, whittling a tent peg—it’s one of the most useful things you can carry.
When choosing a blade, think about straight-edge vs. serrated. Straight edges are great for clean cuts and food prep. Serrated edges are handy for sawing through rope or tougher materials. Many hikers like a blade that has both.
Look for multi-tools that are solidly built, have locking mechanisms for safety, and include tools you’ll actually use.
Fire-Making Tools
I always carry at least two ways to start a fire: usually a lighter and waterproof matches. A ferro rod is my backup, but practice with it first so you’re not figuring it out in a downpour.
One little tool I like is a carabiner with a flint wheel made by Outdoor Element. It’s lightweight and gives you another way to make sparks without taking up much space.
Keep your fire gear dry in a waterproof bag. In a storm or an emergency, being able to light a fire can be a game-changer.
Light Sources
If you think you’ll never get caught out after dark, think again. Long summer days are great, but storms, injuries, or just getting turned around can mean a late return.
I prefer a headlamp to keep hands-free, but something is better than nothing! Always carry extra batteries or a small power bank to keep it running.
First Aid Kit
My kit is small but enough for most trail mishaps:
Adhesive bandages in various sizes
Blister treatment (moleskin or a few blister pads)
A couple of small gauze pads
Medical tape
Tweezers for splinters or ticks
Antiseptic wipes
Antibiotic ointment
Pain relievers like ibuprofen
That’s it—light, compact, and enough to handle cuts, blisters, stings, or small injuries until I’m back at the car.
Bear Safety
Both black bears and grizzlies call the Rockies home, and they deserve respect.
Carry bear spray—and practice how to use it. Keep it accessible, not buried in your pack.
Other deterrents like bear bells or bear bangers can help avoid surprises, but they’re no substitute for staying alert.
Make noise on the trail, hike in groups when you can, and keep an eye out for fresh tracks or scat. Avoidance is always better than contact. Give bears lots of space and change your route if needed.
Emergency Gear
A few small items can make a massive difference if things go sideways. Here’s what’s always in my pack:
Emergency shelter—a lightweight bivy sack, tarp, or space blanket
Emergency whistle—loud, light, and easy to carry
Duct tape or gear repair tape—for fixing ripped gear or broken poles, or even blister protection
Extra snacks or food in case the day runs longer than planned
Personal ID and health card in case rescuers need to identify me
These barely take up any room but can be life-savers when the unexpected happens.
At the end of the day, the Rockies are wild and unpredictable—and that’s part of what makes them incredible. But they’ll humble you fast if you’re not ready. Pack smart, plan ahead, and respect the mountains. You’ll thank yourself when the skies turn dark and you’re still smiling all the way back to the car.


Comments